User Management in Moodle
This guide explains how to create, manage, and enroll users in Moodle. Managing users is crucial for organizing your learning environment and ensuring the right people are assigned to the right courses.
Creating a New User
- Navigate to Site Administration > Users > Accounts > Add a New User.
- Fill in the required details for the new user.
- Scroll down and click Save Changes.
Editing an Existing User
- Navigate to Site Administration > Users > Accounts > Browse list of users.
- Locate the user you want to edit by searching for their username or name.
- Click the Edit icon next to the user.
- Modify the necessary details (e.g., name, email, roles).
- Click Save Changes when done.
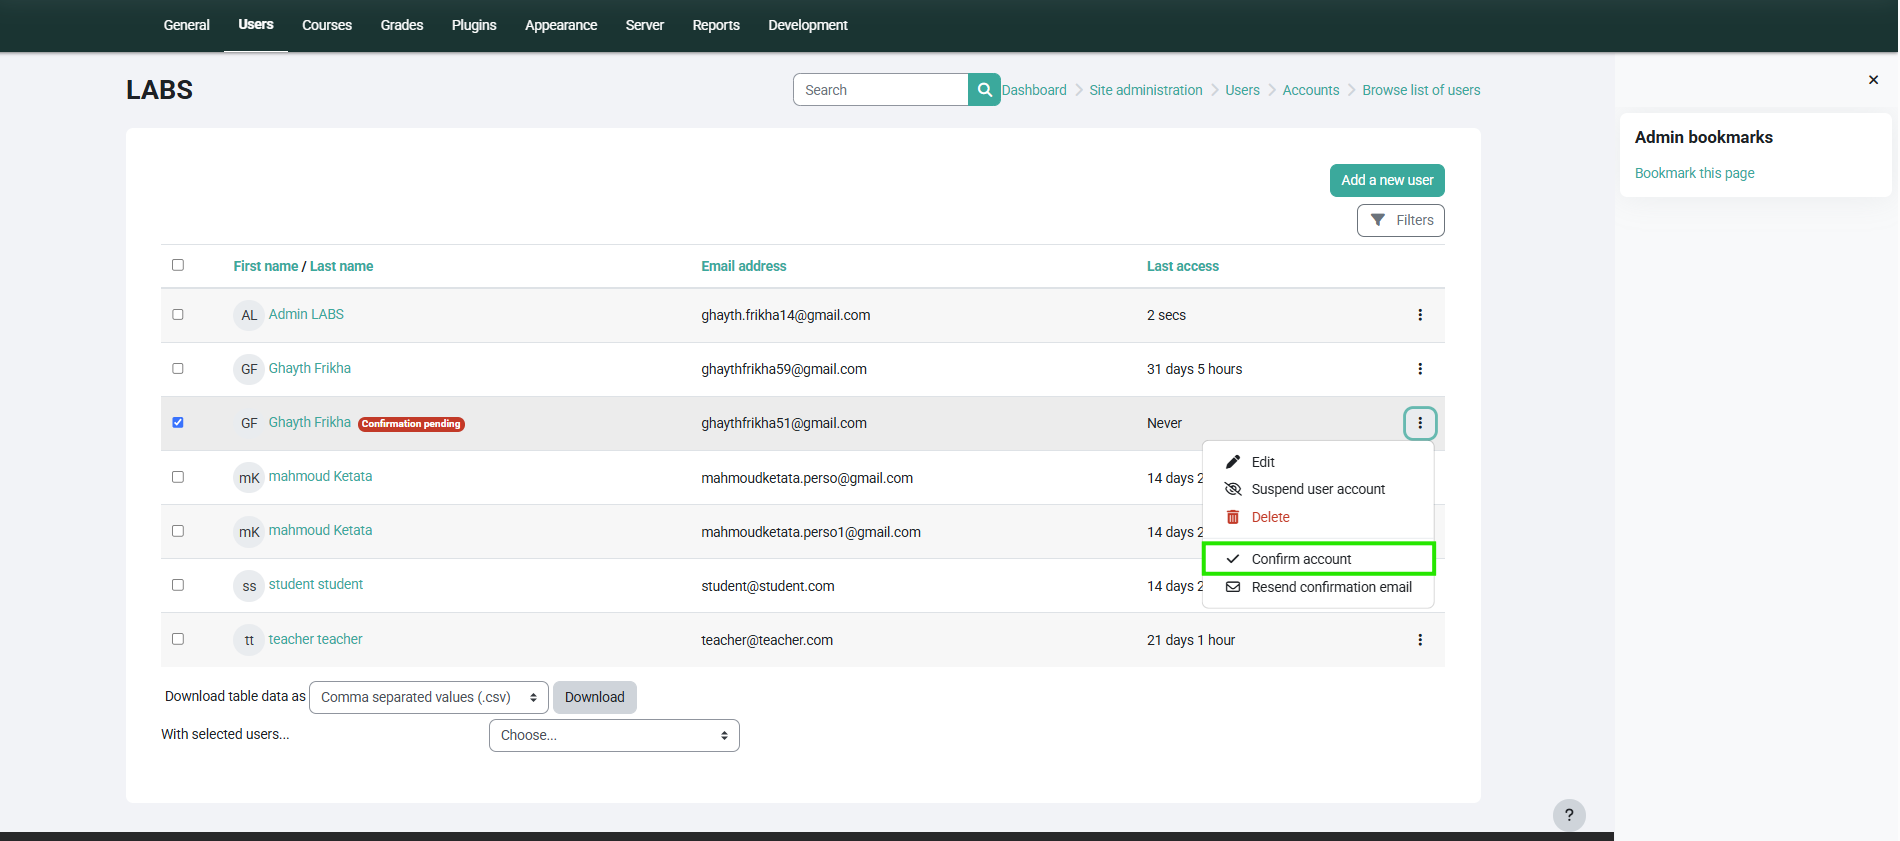
Manually approve user
- Navigate to Site Administration > Users > Accounts > Browse list of users.
- Locate the user you want to approve by searching for their username or name.
- Click the 3 dotes icon next to the user.
- Click confirm account
Enrolling a User in a Course
- Go to the desired course where you want to enroll the user.
- Click on Participants > Enrol Users.

- In the Enrolment options, search for the user.
- Select the user(s) and choose the Role (e.g., Student, Teacher).
- Click Enrol users.
Managing User Roles
- Navigate to Site Administration > Users > Permissions > Define Roles.
- Select the role you wish to modify (e.g., Student, Teacher).
- Modify the permissions as needed, such as:
- Allow/Disallow access to course activities.
- Modify grades and reports.
- Click Save Changes when done.
Viewing User Activity Reports
- Navigate to Site Administration > Reports > User Activity Report.
- Select the course and the user whose activity you want to view.
- Click Generate Report to view their actions within the course.